To read Progress Notes, you have two options:
i. Read progress notes for one or multiple residents
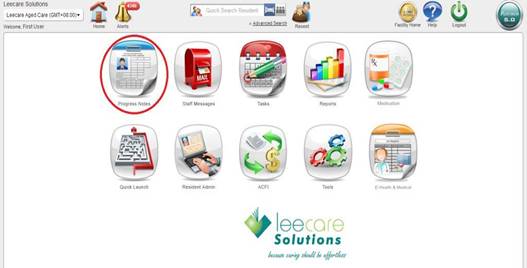
· Select the Progress Notes icon from the Home page
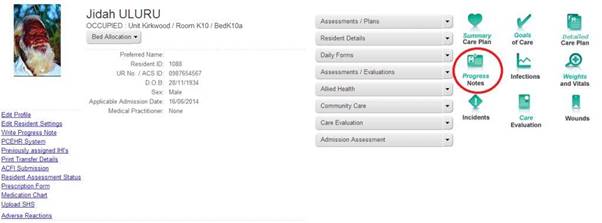
ii. Read progress notes for an individual resident
· Select the Progress Notes icon from the required Resident Page
The Progress Notes screen will now be displayed based upon the option selected in the previous step. Progress notes default to display current, un-read progress notes for the last (X) days(depending on the default set up by the organisations administrator) listed in chronological order with the most recent entry at the top.
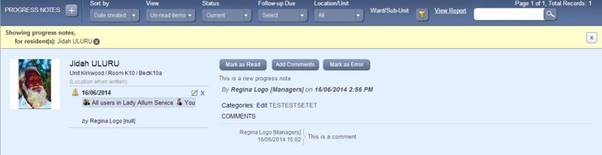
Each progress note entry contains:
· Resident Details – the resident’s full name, photo, unit/room/bed number and details of altered bed status (e.g. On Leave)
· Alerts – details of any current or closed follow-up alerts created for the progress note
· Progress Note Entry – the written entry recorded by the user
· Progress Note Categories – relevant categories associated with the record
· User Details – the full name and designation of the user responsible for entering the progress note
· Date and Time – date and time the progress note was entered
· Comments – additional comments recorded for the progress note, together with the user details, date and time the additional comment was made
· Action links – links to action the progress note including Mark as Read, Mark as Unread, Add Comments, Create Alert, Mark as Error
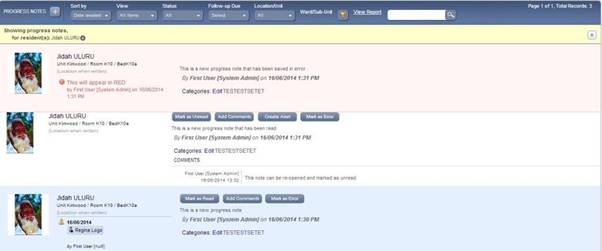
Progress Notes are colour-coded for easy reference:
· Red – Written in Error
· White – Read Progress Notes
· Blue – Un-Read Progress Notes
a) Progress Notes can be filtered using one or more of the filter options in the toolbar:

i. Sort By
· Date created – Sorts progress notes chronologically by date and time created, with the most recent progress note at the top.
· Resident name - Sort’s progress notes alphabetically by resident last name, in descending order.
· Location - Sorts progress notes chronologically by the residents’ most recent locations within the program and then it will continue to show you all their notes (based on the other filter settings.)
ii. View
· Un-read items – Displays only progress notes which you have not yet marked as read.
· Read items – Displays only progress notes which you have marked as read.
· All items – Displays both read and un-read progress notes (not saved in error items.)
iii. Status
· All – Displays both current and ‘saved in error’ progress notes
· Current – Displays only current progress notes, i.e. not those marked as saved in error.
· Saved in error – Displays only those progress notes marked as saved in error.
iv. Follow-up due
· All – Displays all progress notes irrespective of follow-up date.
· Today – Displays all progress notes with an open alert and a follow-up date of today.
· This week – Displays all progress notes with a follow-up date within the next 7 days.
· In next 15 days -Displays all progress notes with a follow-up date within the next 15 days.
· This month – Displays all progress notes with a follow-up date within the next one month.
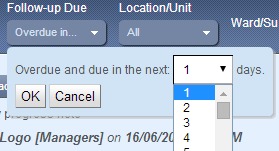
· Overdue in… - Displays a pop up box allowing you set the time frame of follow ups that will need to be acted on in a certain amount of days. This will show you all the follow ups that have been set to be actioned on in the future. You can go forward up to 499 days.
Note: Progress notes with follow-up alert dates in the past will also be displayed.
v. Location/ Unit and Ward/ Sub-Unit
· All- This will show all residents in all units across all the locations that a user has permission to.
· Individual Location/Unit – This will display only those residents’ progress notes for the Location selected.
· Ward/ Sub-Unit – Once a location/ Unit has been selected in the previous section, you can further specify which ward or sub-unit you wish to filter for.
vi. Filter icon
Click the filter icon ![]() and a window will display allowing you to filter the progress notes displayed by one or more of the following options:
and a window will display allowing you to filter the progress notes displayed by one or more of the following options:
· From and To Date – Enter a From and To date to filter progress notes written between these dates.
· Resident – Select one or more Residents from the search field to display only progress notes entered for the selected resident(s).
· Created by – Select a User from the search field to display only progress notes entered by the selected user.
· Category – Select one or more categories to filter progress notes by the selected ‘tag(s).’
· Include progress notes for unadmitted residents- If this is not ticked you will only see progress notes for those residents which are currently admitted into the facility.
Once all required criteria have been entered, select Apply
vii. Word search
![]()
Enter a phrase, word, or part of a word, into the word search field (next to the filter icon), then click the magnifying glass icon to display only progress notes containing the entered text
b) Selected filters will be displayed above the progress note listed on the page in the yellow strip. To clear this selection, click the relevant cross in this section. (Note: The cross beside each selection clears that filter from the search. The cross on the right of the screen clears all filters.)

c) The number of progress notes in the listing is indicated in the top right corner of the Progress Notes screen. For ease of reading progress notes, five records are displayed per page. To scroll through progress note entries, simply click the Previous or Next links to display further records.
![]()
d) Once a progress note has been read you should select Mark as read. The progress note will then display highlighted in white to indicate that you have read it.

Note: When a user marks a progress note as Read, the progress note will only be marked as read for that individual user. It will continue to display as Un-Read for all other users.
e) Once a note has been marked as read, you can change it to Mark as Unread if required.
